Friday, December 13, 2013

Pinterest Craft Show

OK ... I know we haven't had much to say on our Blog for awhile.  We do have a very good reason for this.  We have all been as busy as Santa's Elfs ~  The LJS staff decided to comb through Pinterest for amazing projects.  We then took the last 2 months making all these amazing projects.  Last weekend we held our first Pinterest Craft Show and it was a total success!

So .... We thought we should share with you what we did and give you a few pointers as we go.  We also thought it would be helpful to tell you how long it would take you to make one from start to finish. 

 Photo Tile

Supplies:  Tile (you pick the size, pattern paper, Mod Podge and embellishments)
Time Spent:  1-2 Hours
These were very simple but extremely messy to make.  Cut your paper and lay things out how you like them.
Mod Podge in layers, being very generous with the Mod Podge.  Flatten paper with a brayer after each layer.  We added mini cloths pins so pictures could easily be changed out.


Cinnamon Ornaments

Supplies:  (1 cup Apple Sauce, 1 cup Cinnamon, cookie cutters, bakers twine & oven)
Time Spent:  Over Night 
Mix the apple sauce and cinnamon.  We found it takes a little over a cup of cinnamon to make it cookie dough consistency.  Roll out just like you are making sugar cookie cut outs.  One word of advise on this project ... Make the cut outs thick.   Make sure to punch a hole in top before baking.  Bake at 200 for 1.5 hours.  Let them continue to dry over night then add the twine the next day.  


Primative Heart Ornament

Supplies: (plastic candy canes, muslin fabric, bakers twine, ink and hot glue gun)
Time Spent:  20-30 Minutes
Cut your fabric in 1" strips.  Start by wrapping the end then work your way around the candy cane, hot glue to the candy cane.  Ink the fabric as desired.   Hot glue the 2 together to make a heart, then add the twine to dress it up.
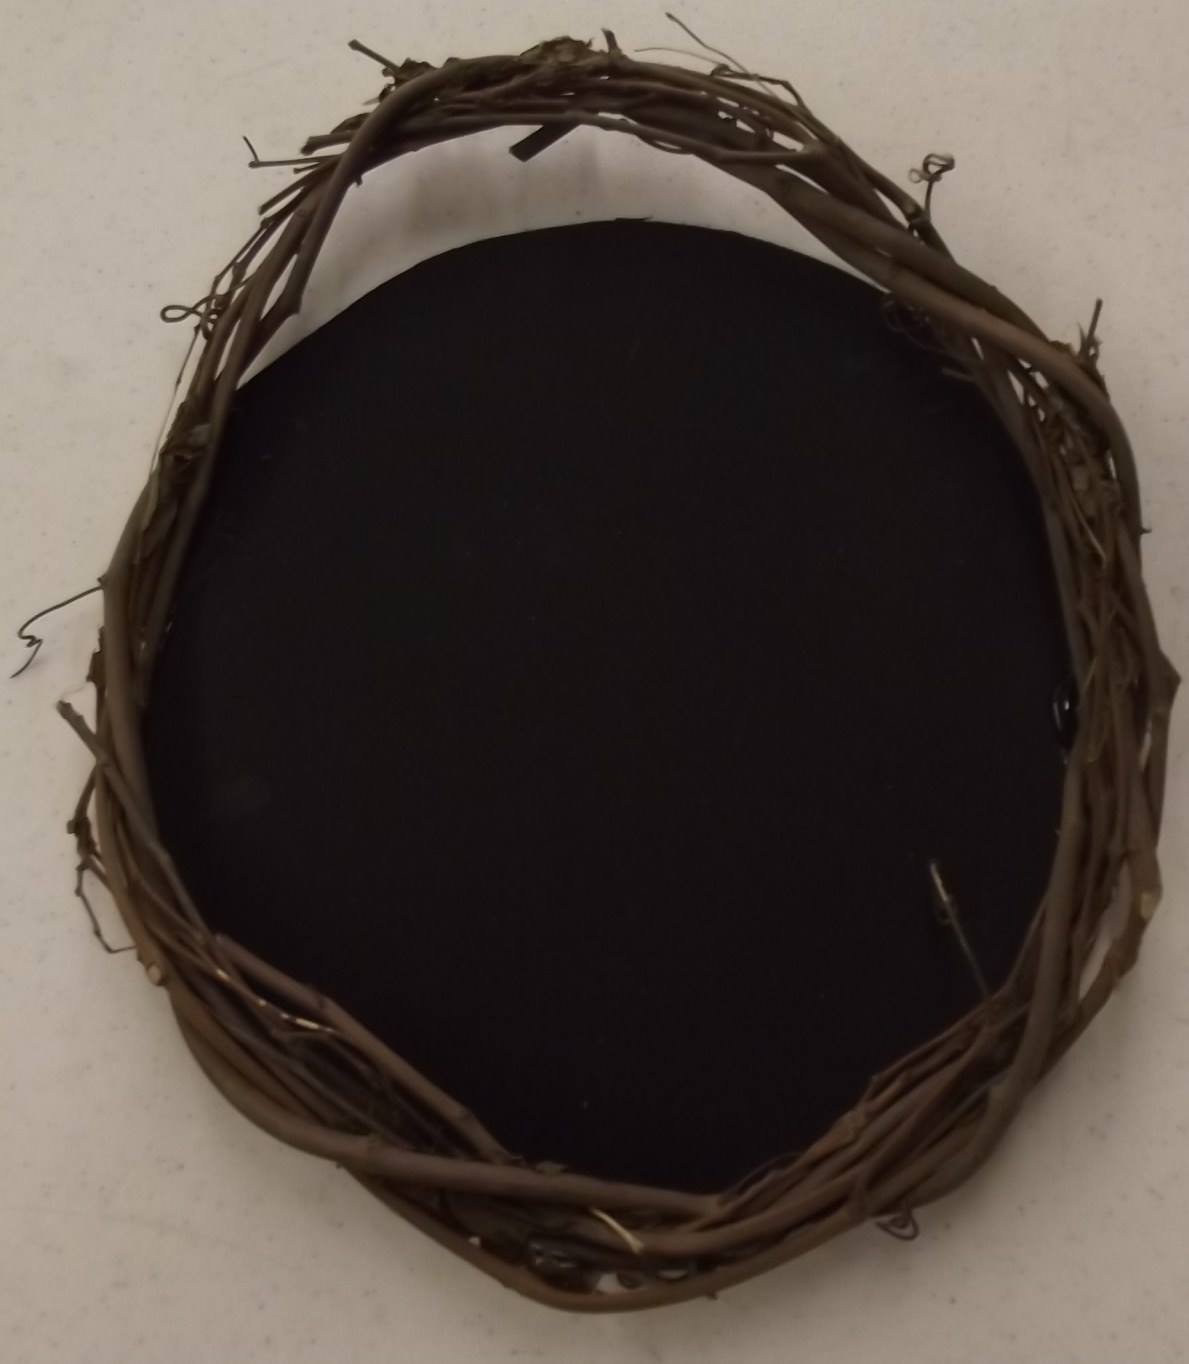

Chalkboard Ornament

Supplies: (ceramic ornament, chalkboard spray paint, chalkboard glimmer mist and embellishments)  Time Spent:  15-30 Minutes
These are so easy and extremely adorable.  Simply spray the ceramic ornament with chalkboard spray paint front & back.  Allow to dry then spray with glimmer mist to get the used chalkboard look.  Add embellishments as desired.  You may also want to use a bistro chalk pen to add a name or saying.


Vintage Ornament

Supplies: (ceramic ornament, book pages, gel medium, glimmer mist & embellishments)
Time Spent:  30-45 Minutes 
This is a bit more time consuming but looks amazing when you are done.  Cut your book pages into 1/2" strips using gel medium adhere to the ornament by over lapping the strips of paper.  Go all the way around the ornament.  Allow to dry then spray with glimmer mist, we used coffee shop.  Then embellish as desired.


Vintage Snowflake

Supplies: (plastic snowflakes we found at the dollar store, book pages, scalloped circle punch, Prima roses and hot glue) Time Spent:  5-10 Minutes
These were super easy ... punch your book page with the scalloped punch.  Hot glue to the snowflake then hot glue the rose.  We off centered ours to add interest.  That is it ... all done and ready for the tree.


Vintage Paper Snowflake Ornament

Supplies: (plastic snowflake, book pages, embellishments & hot glue)
Time Spent:  15-20 Minutes
Cut your book page in 3x3 or 2x2 squares depending on size of snowflake.  Roll up and hot glue together then hot glue around the snowflake.  Embellish the center as desired.


Menu / Notes Plate

Supplies: (Charger plate, chalkboard spray paint and letters)
Time Spent:  15-20 Minutes
We recently made these during one of our Pinterest Parties ... we used bistro chalk pens to write "Days Until Christmas"  I love that look so well I decided you could make them for all year round.  Simply spray paint any charger plate with chalkboard paint.  You can do the whole plate or just the center.  I used vinyl letters on the the plates pictured above.
 

SANTA Blocks

Supplies: (2x4x4 wood blocks, Red~White~Black spray paint, Vaseline and letters) 
Time Spent:  1-2 Hours
I cut 2x4's into 2x4x4 blocks using scrap pieces of wood we had in our shop, cut 5 in all.  First spray edges of blocks with white paint.  When dry rub Vaseline on edge for desired effect.  Spray 4 of them with red paint and one with black paint.  I sprayed the backs also.  When the paint is almost dry use paper towel to wipe off the paint in the areas where you rubbed Vaseline.  This will create the look you see above.  Once completely line the red blocks up and cover the top and the bottom until you have belt across the middle.  Then spray with black paint.  Once dry add your letters.  We used the Cricut to cut our letters.


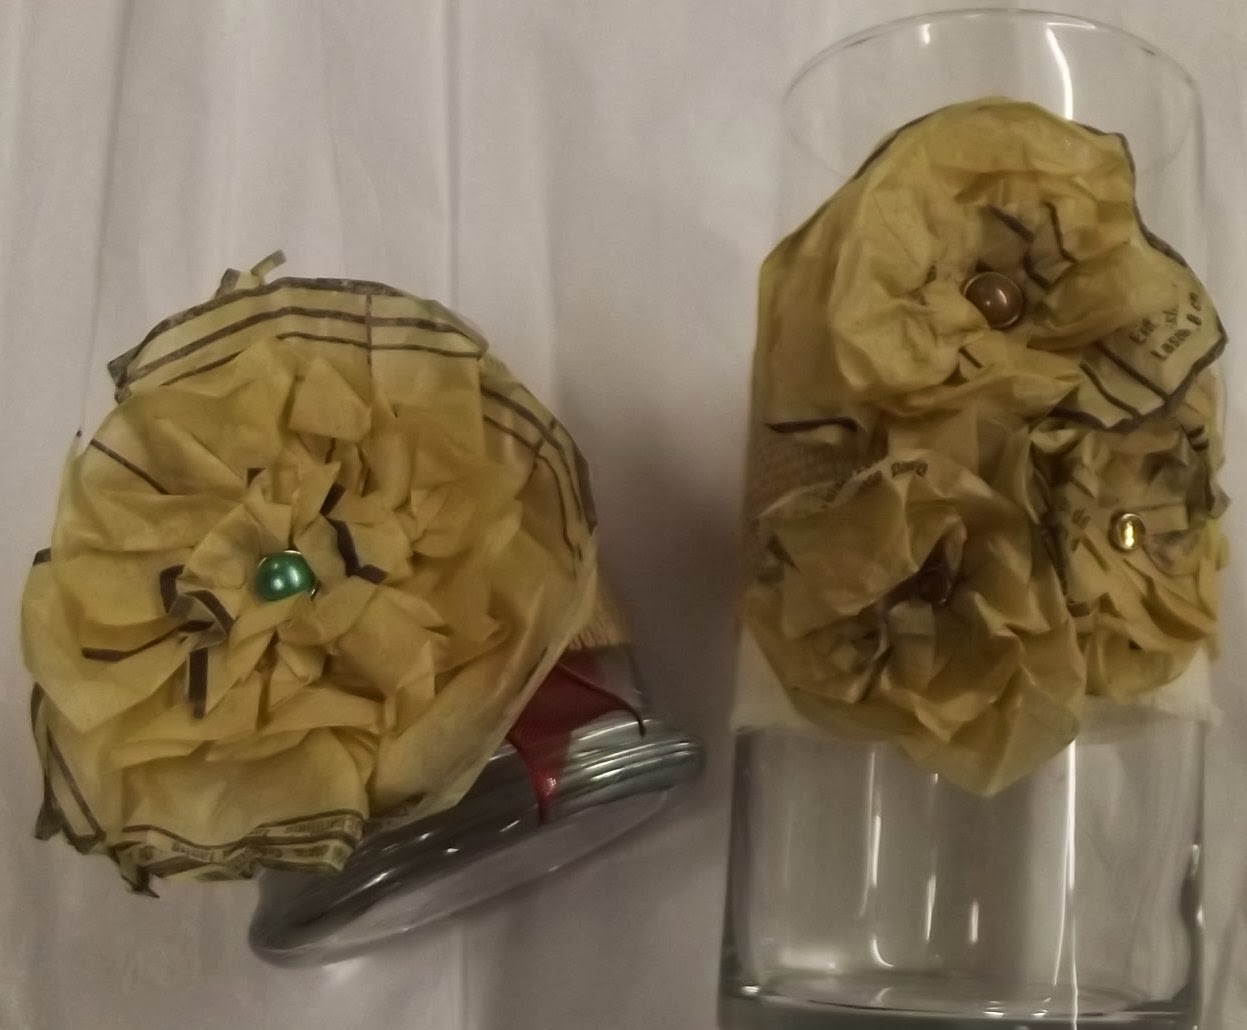
Vintage Paper Flowers

Supplies: (old patters, scrap paper, decorative brads and adhesive)
Time Spent:  15-20 Minutes
Cut the old patterns into strips, vary the width to create a layered look.  Glue in a circular look to a scrap piece of paper approximately 1x1.  Once you have your desired look put a decorative brad in the center to complete the look.  We also used decorative buttons and they look just as nice.
 

Mixed Media Book Covers

Supplies (old book cover, paints, templates, modeling paste and embellishments)
Time Spent:  1-2 Hours
This is one of those projects where you can just be free to use your imagination.  We made several different themes with the book covers and each is so different.  We added a doily look to the center of this book cover using a doily template, modeling paste and paints.  Then we just had fun dressing it up in a crafters theme using a wide variety of embellishments.  Watch for a class to come on this project.
 

Believe Block

Time Spent:  30-60 Minutes
You will make this block the same as the Santa blocks.  Just change your paint colors.  
The block was cut in 2x4x6 size


Vintage Tree

Supplies: (cone styrofoam form, Popsicle sticks, wood block, glimmer mist, embellishments and hot glue) Time Spent:  1-2 Hours
Super simple ... just start glueing popsicle sticks to the form.  Start on the bottom row first then layer on top.  Once done spray with glimmer mist ... we used coffee shop.  Cut a wood block 1x2x2, paint it brown if you desire.  Embellish the top as desired and you have the cutest little vintage tree.


Vintage Treat Box

Supplies: (Maya Road Houses, Gesso paints, glitter, modeling paste, book page & old music sheets, ink and embellishments)  Time Spent: 2-3 Hours
This project was one of my favorite projects ever. First paint the house white, we used white Gesso.  We used the Vaseline trick on the roof when painting it brown to get the snow look.  Then use your imagination to complete this house.  We did print vintage photos off on copy paper and glued them to the window to give a home like look. Add modeling paste to give the 3D look of show then before it drys add glitter.


SnowMan Block

Supplies: (4x4x7 wood block, white spray paint, sharpie, orange paint, burlap/fabric, ribbon and embellishments)  Time Spent:  30-45 minutes
Spray paint you wood block, we used several coats.  Then paint your nose use a sharpie for the eyes, mouth and lettering.  Glue a burlap/fabric hat on the block then embellish.  
 

Flour Sack Towel

Supplies: (flour sack towel, acrylic paint, fabric medium, sponge brushes and stamps)
Time Spent:  20-30 minutes
Pick your stamp set.  Then mix fabric medium with acrylic paint.  Sponge paint onto stamp then stamp directly on the towel.  Make sure you have something under the towel to avoid any issues with bleeding paint.  Let dry for 24 hours before washing.


Thought I would show you a couple of projects we did using those amazing vintage paper flowers.  These turned out so darn cute and would make amazing gifts that can be used all year round... just change out the candle and you will have a whole new look.


 All of the items pictured here are for sale in our store.  If you are from out of town feel free to contact us at lifesjourneyscrapbooking@yahoo.com for prices for and more information.

Saturday, October 5, 2013

September Pinterest Party


We had such an amazing time at the September Pinterest Party.  Both projects were fall themed.  
Project #1 ~ Pumpkins out of dryer venting
Project #2 ~ Pumpkin wood blocks to spell FALL


 You need dryer venting, spray paint, various sizes wood blocks, twigs, raffia, pattern paper, jute, wire and adhesives (hot glue & wood glue).

 Start by cutting your dryer vent into 2' sections.  Then form a circle shape, hot glue the ends together.   Spray paint the dryer venting and the wood blocks.  This is a process and can take up to an hour to get it all completed.  You will have to put 2-3 coats on the dryer venting to get an even covering.
 Once everything is dry, start decorating.  We cut leaves & the word 'FALL' out of pattern paper.  Let the fun begin.  Be as creative as you would like to be with decorating your pumpkins.

Next Pinterest Party is October 19th ... Make sure you get your name on the list.  We will be doing amazing Christmas Projects!

Sunday, July 28, 2013

Sneak Peek !!


The Design Team at LJS is Soooo Excited!  


July 31st we are launching our new kit club.
We totally understand the times are changing ... along with the extras we can and can not afford.  The Design Team members got together and devised a plan to help you get your crafting / scrapbooking fix in and not break the bank in the process.  To start off our new adventure ...


 We ordered 25 new papers with varied themes ... Trust me when I say we have something for everyone!


 We came up with a wide array of themes:  Vintage, Family, Travel, Boy, Girl, Baby ...
Then the Design Team got to work and came up with some amazing pages.  When I say amazing I think this is some of their best work!!!


 This is a sample of our first page.  If you like this page you will need to have your kit reserved by August 6th ... you will be able to pick it up Aug. 9th.   ~ only 12 kits are available


Here is how the NEW Club will work:

1. LJ Page Kit 

* Become a member for 6 months.  Your investment is $30 (up front) for 6 kits.
* During the 6 month period you get first option at any 6 kits,  we will release 18-24 kits during the 6 month period.
* To reserve a kit just let us know before the dead line date for that kit.
*  Can you order more than one of the same kit ... Yes
*  What if you want more than 6 of the kits produced ... just simply order your extra kit and you pay the reduced price of $5.
*  Kits will include only the items shown in the photos and detailed directions for construction.

2. LJ Packs

* Become a member for 6 months.  Your investment is $18 (up front) for 6 kits.

* During the 6 month period you get first option at any 6 kits,  we will release 18-24 kits during the 6 month period.
* To reserve a kit just let us know before the dead line date for that kit.
*  Can you order more than one of the same kit ... Yes
*  What if you want more than 6 of the kits produced ... just simply order your extra kit and you pay the reduced price of $3.
*  Kits will include a unique variety of extra embellishments and photo mats to add to your page or to accompany project life sleeves. (embellishments may vary from kit to kit)

3. LJ Card Kit

* Become a member for 6 months.  Your investment is $24 (up front) for 6 kits.
* During the 6 month period you get first option at any 6 kits,  we will release 18-24 kits during the 6 month period.
* To reserve a kit just let us know before the dead line date for that kit.
*  Can you order more than one of the same kit ... Yes
*  What if you want more than 6 of the kits produced ... just simply order your extra kit and you pay the reduced price of $4.
*  Kits will include supplies for 2 cards plus card designs. (embellishments may vary from kit to kit)


Kit club members will have the first option to order before any kit is released to the general public.
Kits will be posted with a limited number available, when we sell out we will not be making any others.
Embellishments may vary but will stay in theme context so it will always match.

If you are not a KIT CLUB member here is what you will pay:
1. LJ Page Kit ~ $6.99
2. LJ Packs ~ $3.99
3. LJ Cards ~ $4.99

Come and check out the first 9 kits on July 31st from 6-8p.

Sunday, June 30, 2013

Nailed IT!

 I'm so in love with this project ~ I saw this done a couple of different ways several months ago and could not wait for the perfect time to create my own distressed 4th of July Fire Crackers.

List of supplies ~ Lumber; brown, red, white, blue craft paints; paint brushes/sponges; sand paper / block; wire and jute/raffia.


 You will need scrap lumber ~ 2x2 square.  I off set the length of each piece to give it interest; lumber can be cut to your desired size at most lumber yards for free.
Use brown craft paint on the edges.  Once the brown is dry, apply Vaseline to the edge.  Paint each piece your desired colors.  I did 2 different color schemes - one is bright and one more rustic.  I ended up applying 2 coats to each.


 Then Sand like crazy.  I roughed up all the edges and some in the middle to give the weathered look. 
Next drill a hole in the top, curl up some wire to give the wick appearance.  I glued my wire into the holes so there was no chance of it coming out. 
Use jute or raffia to hold them together and WALLA you have super cute 4th decos for your home or office.


 These are my final products.  Others put words on their finished product... I like mine plain.
If you would like to see them up close and personal they are on display in our front window.
I'm pretty sure we totally nailed this one!


Friday, June 21, 2013

Nailed IT!

I have seen multiple versions of this project all over Pinterest ... So we thought we would try our hand at the chalkboard wreath ... Nailed IT!

Here is what you will need:  Grape vine wreath of your choice, chipboard, chalk board paint / spray and embellishments. 
The biggest trick with this project is cutting the chipboard circle that will fit right in the wreath.  As you can see my wreath is a bit wonkie, so I decided to leave it as such to add character and a place to provide embellishment.  Once you cut your circle, apply your chalk board paint.  I chose to use spray paint because it is quick and easy.  I also noticed 2 coats worked the best with the spray.
Once the paint dried I hot glued my new chalk board to the wreath.
Added my embellishments and WALLA ~ fancy new chalk board!  This was a super easy project with minimal difficulties.  You could have it done in 1 hour or less.

If you would like to make one for your home but don't want to run around town to find the right supplies ... Join us for the July 20th Pinterest Party and we will knock this project out.

Shannen